Installation files are provided as a zip on request and may be downloaded from the XIMES cloud. Have your License-Info file ready. See also System requirements
PostgreSQL server installation (optional) Note : PostgreSQL 12 is not yet supported!
No
Description
Screenshot
1
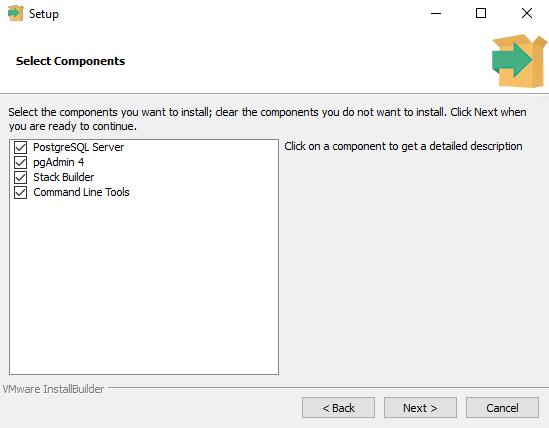
PostgreSQL database server setup
default port 5432 set a password for postgres user 2
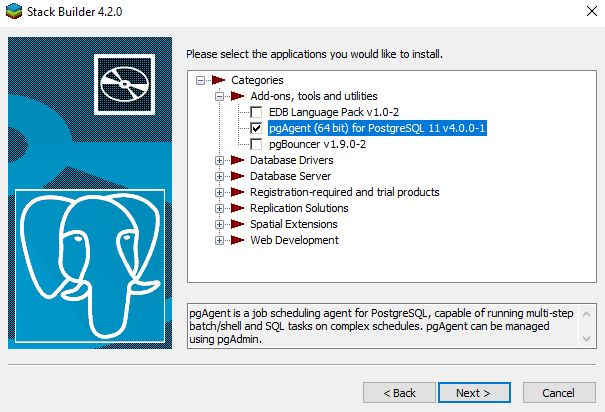
pgbouncher (optional)
3
pgagent for each TISDB
4
create user tisdbadm
createuser -U postgres -h localhost -p 5432 --pwprompt --encrypted --createdb --createrole --inherit --login tisdbadm 5
C:\Users\Administrator\AppData\Roaming\postgresql\pgpass.conf
replace <password>
localhost:5432:*:tisdbadm:<password> 6
C:\Users\Administrator\AppData\Roaming\postgresql\.pg_service.conf
[local_tisdbadm] 7
test connection for service local_tisdbadm
C:\Program Files\PostgreSQL\11\bin>psql service=local_tisdbadm postgres=>
8
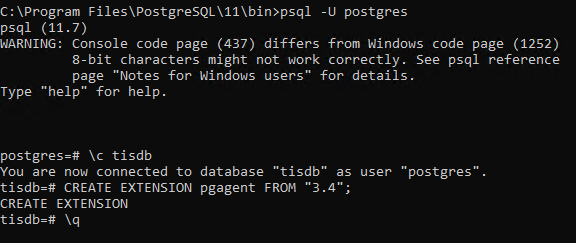
Upgrade pgagent extension version (optional)
In case you find following error in windows event log, then use psql and connect to target database and upgrade extension.
Unsupported schema version: 3. Version 4 is required - please run pgagent_upgrade.sql.
CREATE EXTENSION pgagent FROM "3.4";
9
create a pgagent for a specific TISDB
No
Description
Screenshot
1
Extract zip to C:\Install
2
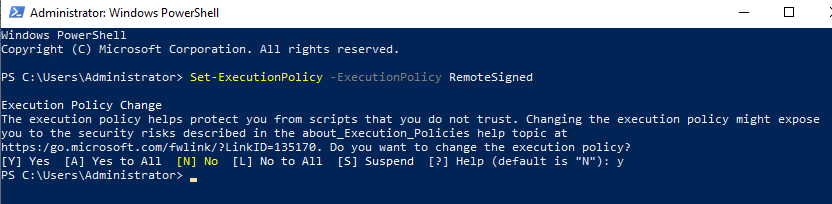
Run Powershell as Administrator and execute command 3
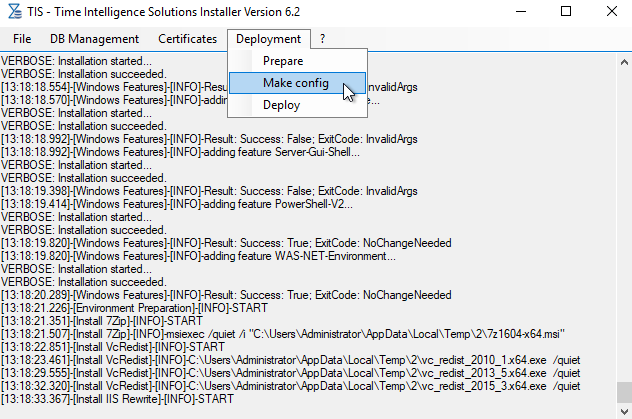
Execute TISInstaller.exe as Administrator
4
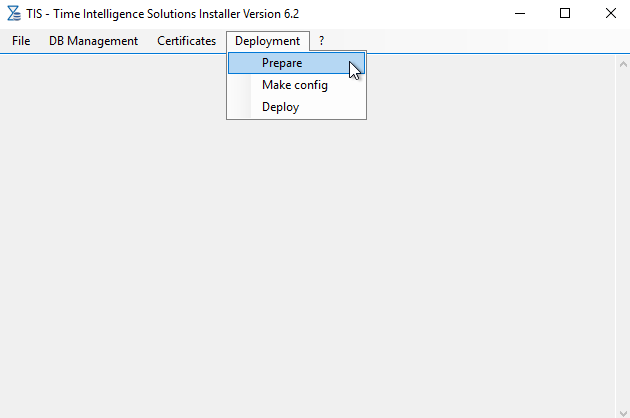
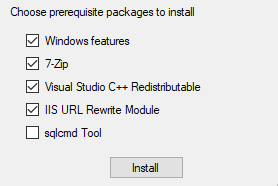
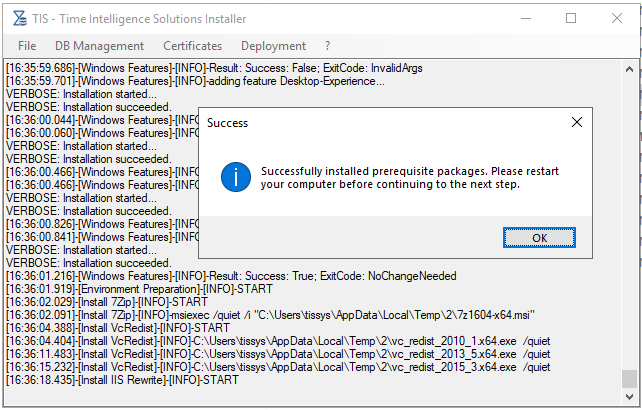
On a new Windows Machine prerequisits have to be installed using the Deployment/Prepare commandSelect all items in dialogselect sqlcmd only for MSSQL 5
6
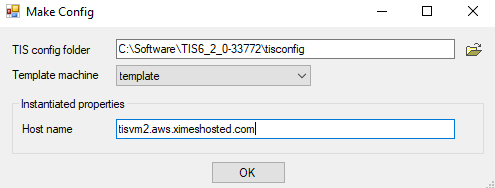
select Make config in Deployment menu 7
create a new tisconfig enter your host name 7b
Change site name (optional)
default is TIS rename folder tisconfig\machines\<yourhostname>\hosts\tis to your site name adapt tisconfig\machines\<yourhostname>\hosts\<site name>\settings.xml adapt TISBoardSettings.js TISBoard.MAINCONNECTURL = "/<sitename>/TISBoard/Dispatcher.svc';TISBoard.SitePatch = '/<sitename>'; adapt EditorSettings.js window.EditorSettings.site_path = "<sitename>"
8a
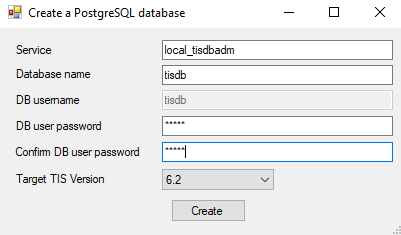
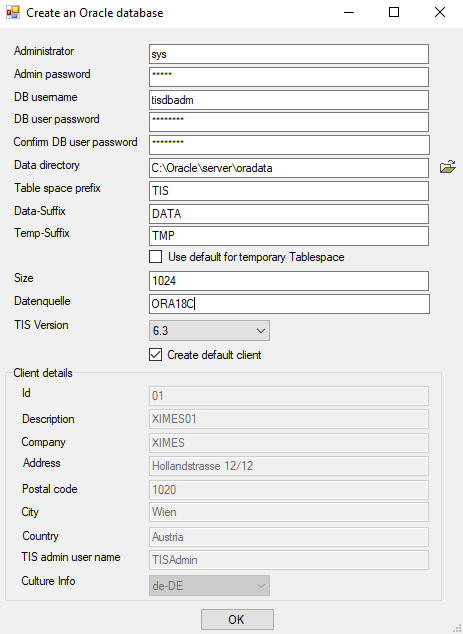
create a new database TISDB for PostgreSQL enter database name enter password for database user 8b
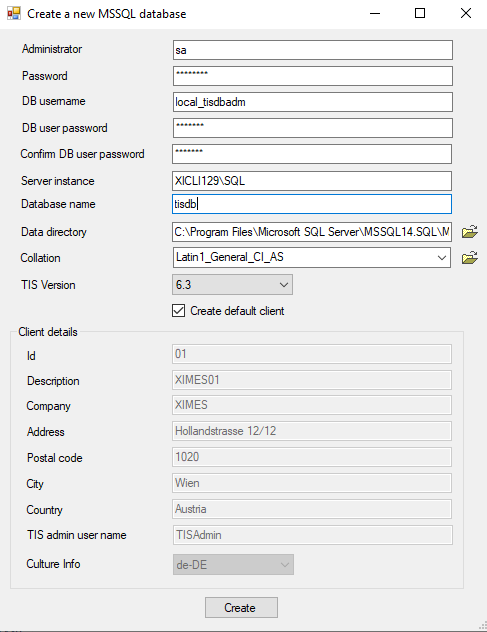
create a new database TISDB for MSSQL enter database name enter a password for the database user enter default TISAdmin usernameuser must be available in the specified identity server as a result specified user has CLIENTADMINISTRATOR role has permission for User Management 8c
create a new database TISDB for Oracle enter database name enter a password for the database user enter default TISAdmin usernameuser must be available in the specified identity server as a result specified user has CLIENTADMINISTRATOR role has permission for User Management 9
select target folder for ximesdalconfig.xml by selecting the your host name folder in machines folder and your site name in the hosts folder 10
Please make sure pgagent instance for your TISDB is already created before you carry on ... (see step 8 and 9 in PostgreSQL installation)
Create/update a database and save ximesdalconfig.xml to your tisconfig\machine\template\hosts\tis folder
PostgreSQL you need to adapt your ximesdalconfig.xml and add the password to the connection string use psql -U postgres and set the database user's password with \password tisdb
Adapt tisconfig
copy or rename folder tisconfig\machines\template to your hostname e.g. tisconfig\machines\myhost.com adapt file tisconfig\machine\template\hosts\settings.xml
set MachineConfig\Name to your hostname (FQDN) set MachineConfig\IISSettings\HostName to your hostname (FQDN)
11
adapt the tisconfig\machine\<yourhostname> \hosts\tis\settings.xml
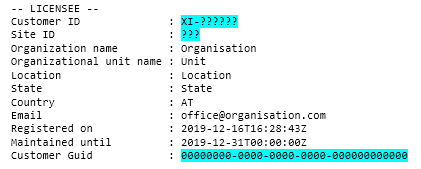
optionally set SiteConfig\Name to another name for the base path in the resulting URL use your License-Info file for following settingsset SiteConfig\Licensing\CustomerId set SiteConfig\Licensing\CustomerGuid set SiteConfig\Licensing\SiteId 12
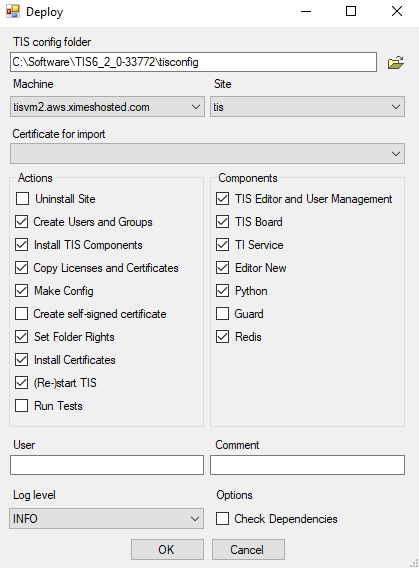
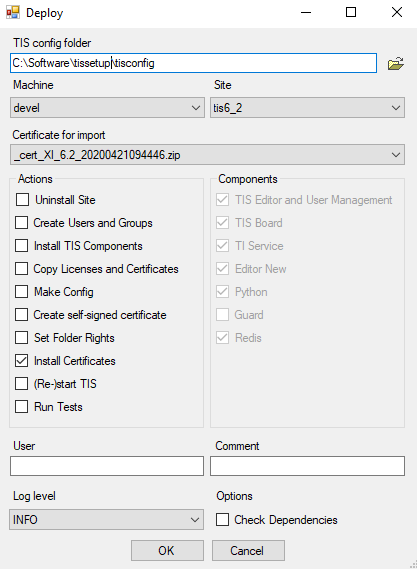
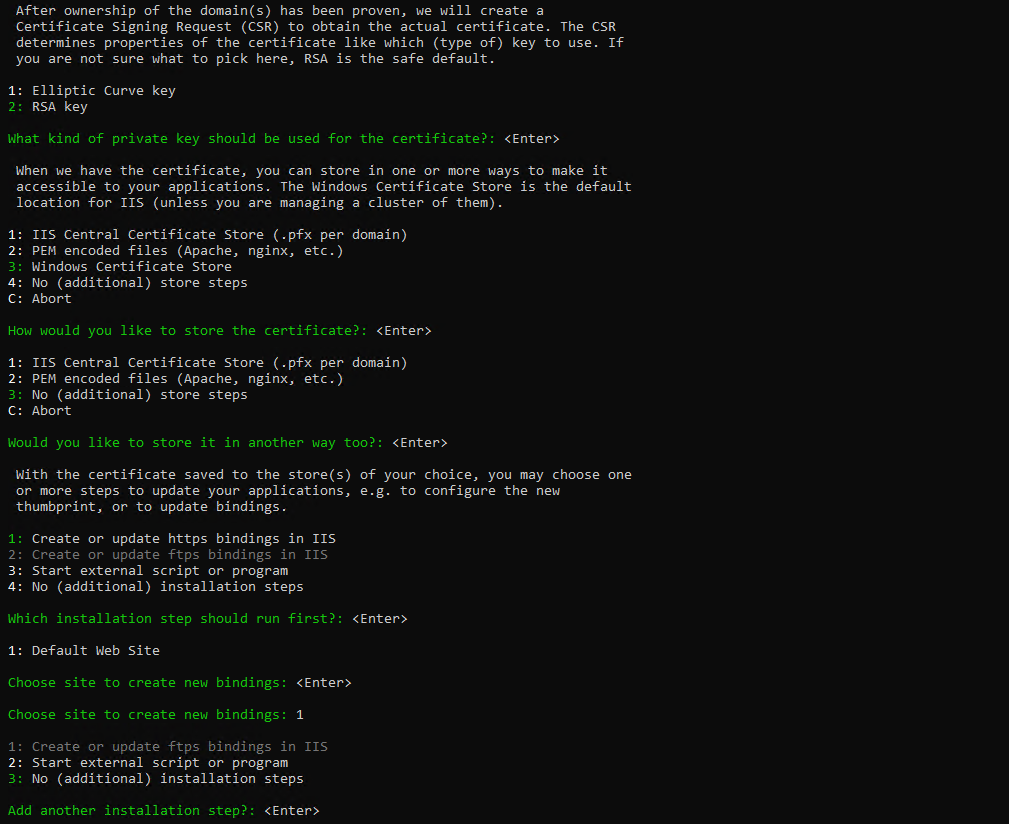
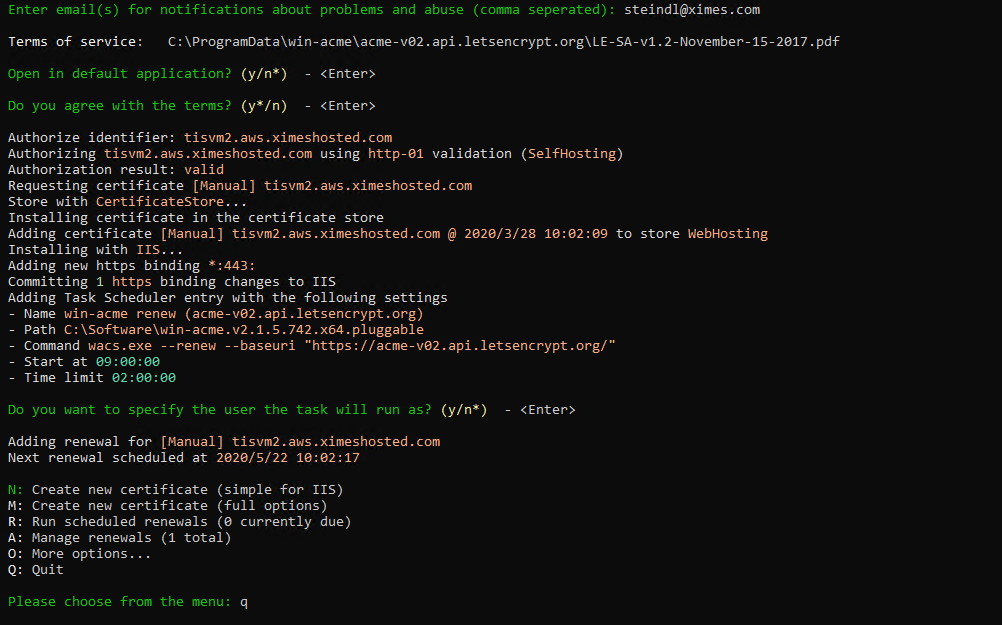
Deploy TIS software select machine and site from the tisconfig folder optionally select Create a self-signed certificate for SSL offline deployment without an internet connection, untick Install Certificates and follow the instructions at step 13
13
Certificate installation for offline deployment (optional )
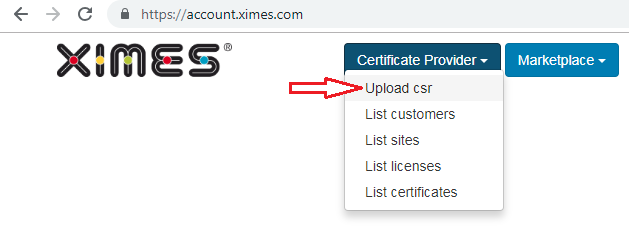
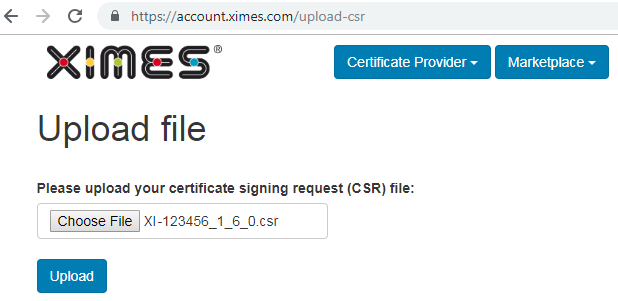
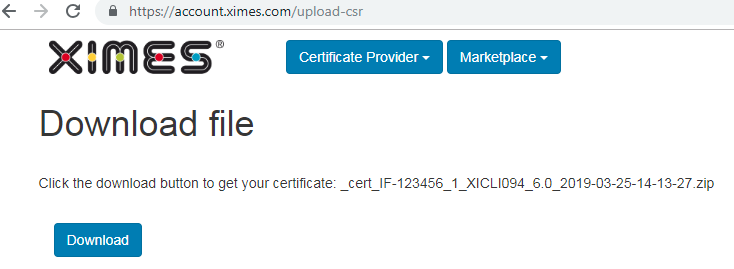
In C:\ProgramData\XIMES\TIS\!!!hostname\!!!sitename\ you will find the u_iis_tiss_tis.csr file for upload. Upload CSR and download certificate (zip): Select Certificate provider and click on Upload csr Upload your certificate signing request file Download your certificate in ZIP format Copy the downloaded Certificate into C:\ProgramData\XIMES\TIS\!!!hostname\!!!sitename\Run deployment again but only tick Install Certificates and untick everything else From the Certificate for Import dropdown list select your Certificate.
14
TIS 6.0 Stand-alone Installation with Oracle
TIS 6.4 Stand-alone Installation