Installation files are provided as a zip (called a TISInstaller zip) on request and may be downloaded from the XIMES cloud. Please make sure that you have the specific PLANO build of TIS
Two license files are necessary for the installation, namely the file IR.lic and a TIS license info file whose name is of the form CustomerId_SiteId_TisVersion.txt (for example IT-test_GeneralRuntimeDev_7.0.txt)
A tisconfig folder is a folder that contains a subfolder called deploymentconfigs. Inside this subfolder, more than one TIS CONFIGs can be stored, each can be used to deploy a TIS installation. Normally at customer, there is only 1 config to be used. By convention, our tisconfig folder is C:\Install\tisconfig. Then a config called MyDeploymentConfig will be located at C:\Install\tisconfig\deploymentconfigs\MyDeploymentConfig.
Installation Steps
1. Start TISInstaller
Step
Description
Screenshot
1.1
Extract the TISInstaller zip to C:\Install.
For each TIS version, please preserve at least the extracted TISInstaller folder of the latest release for other purposes like uninstalling TIS or installing certificates, etc.
1.2
Optionally unblock files from the Internet. On some servers files might be blocked by the operating system and must be unblock explicitly. See also Microsoft's documentation
Get-ChildItem . -Recurse | Unblock-File
1.3
Execute TISInstaller.exe as Administrator
2. Prepare (normally for machines on which TIS is installed the first time)
Step
Description
Screenshot
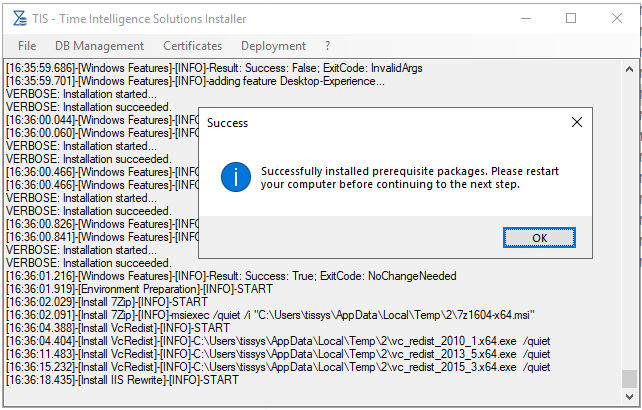
2.1
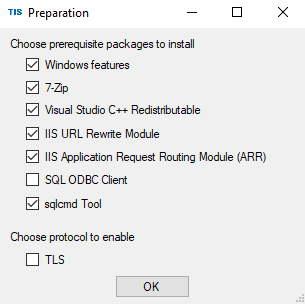
On a new Windows Machine prerequisites have to be installed using the Deployment/Prepare command
Select all items in dialog
select sqlcmd only for MSSQL
2.2
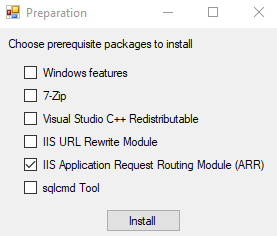
Prepare.ps1 might exit with error:
Please check whether you have access to the internet. If it is not the case, you will need to install .NET Framework 3.5 offline using your Windows installation DVD.
2.3
For TIS cluster deployment install ARR (optional)
select item in prepare
2.4
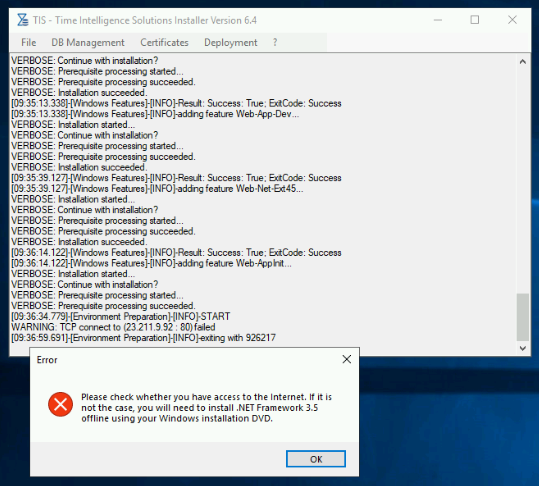
Reboot if requested
Note that on a totally fresh machine (TIS has never been installed using TISInstaller), it could happen that the computer is automatically rebooted after preparation without any notice. This is however not harmful to TIS installation and the computer.
3. Make config
Step
Description
Screenshot
3.1
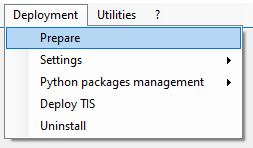
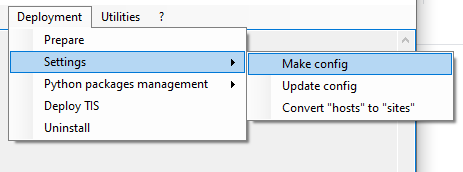
Select Make config in Deployment menu
3.2
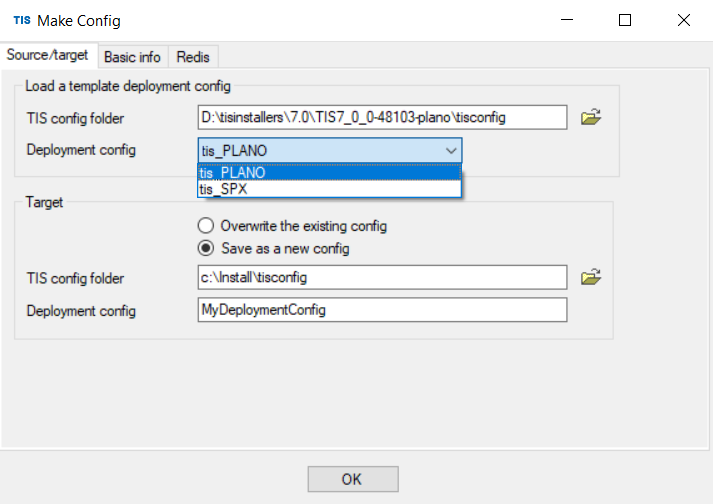
Two config templates are provided with TISInstaller, tis_SPX for SPX and one for tis_PLANO Plano deployment, respectively. Choose the appropriate config template.
Choose whether you want to overwrite the template or create an individual folder in tisconfig (or elsewhere, ajdust the path). In the latter case, provide a deployment config name.
Conventionally we choose C:\Install\tisconfig as our tisconfig folder (see Important Notes).
3.3
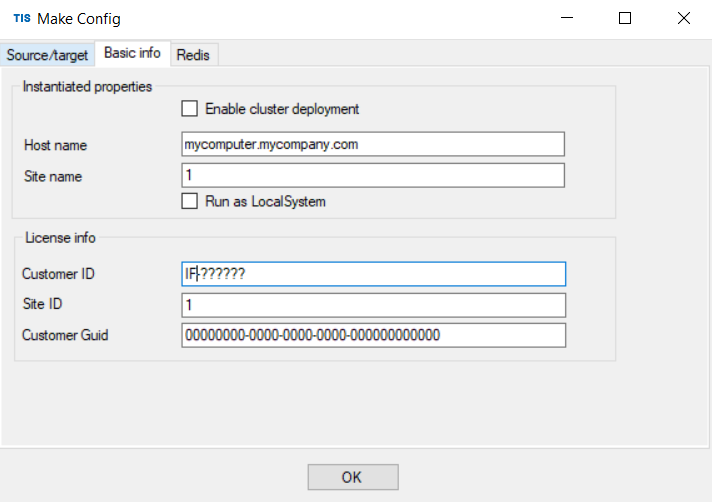
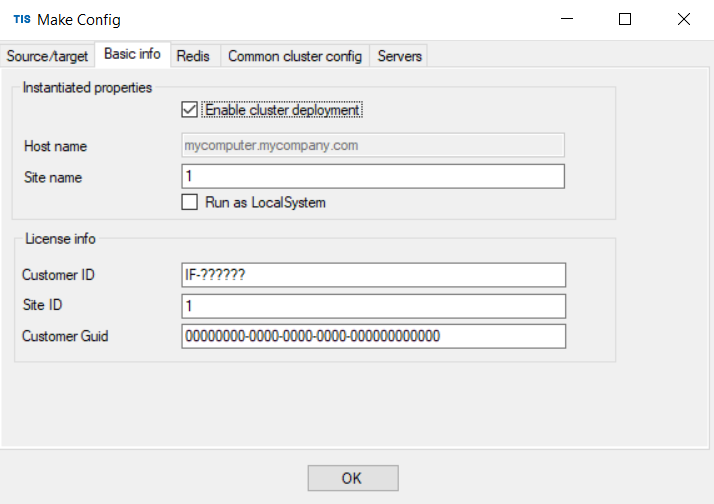
Switch to the "Basic info" tab.
Enter your host name and site name
Enter your license information
In case of a cluster deployment, tick the "Enable cluster deployment" option
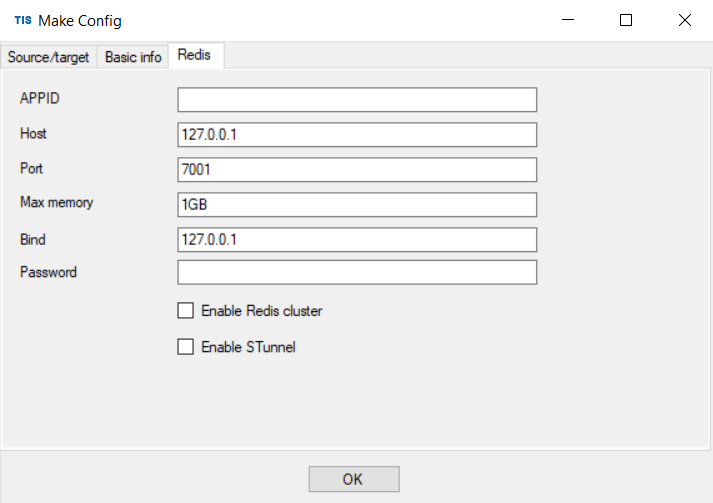
3.4
Provide Redis config
3.5
In case of a cluster deployment (if "Enable cluster deployment" was chosen in step 3.3)
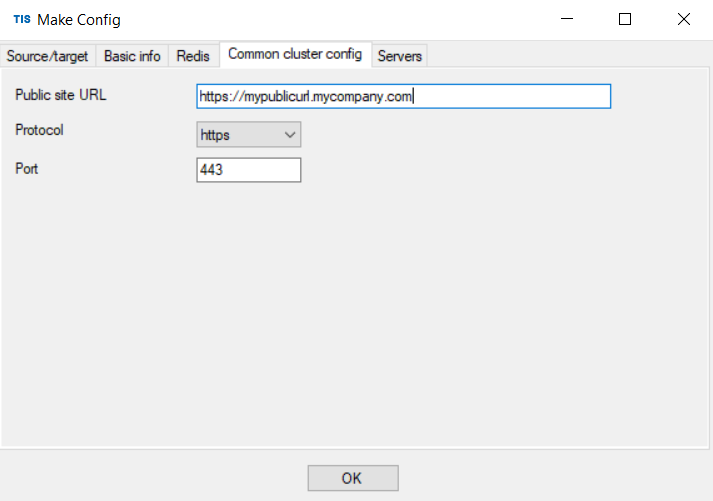
3.5.1
Switch to "Common cluster config" tab and fill in the form
3.5.2
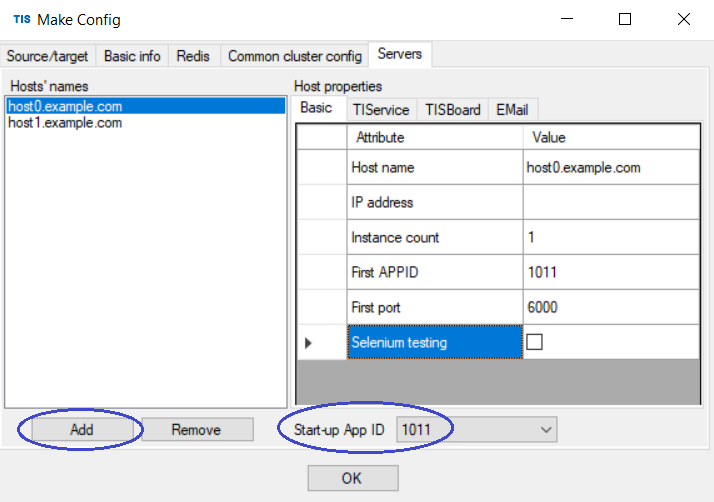
Switch to "Servers" tab and add a new host by clicking on "Add" button. Fill in the host name, IP address and instance count in the table on the right. Adjust First APPID and port.
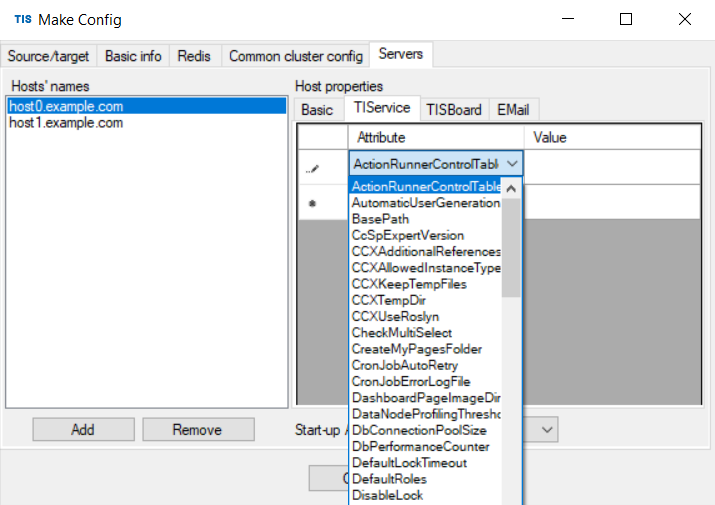
3.5.3
It is possible to specify additional attributes for TIService, TISBoard and EMail in their respective tabs. For more information seeTIService Settings.
NEXT: execute either step 6 or 7, depending on whether a TIS database already exists.
6. Create databases
6.1. Create MSSQL databases
Step
Description
Screenshot
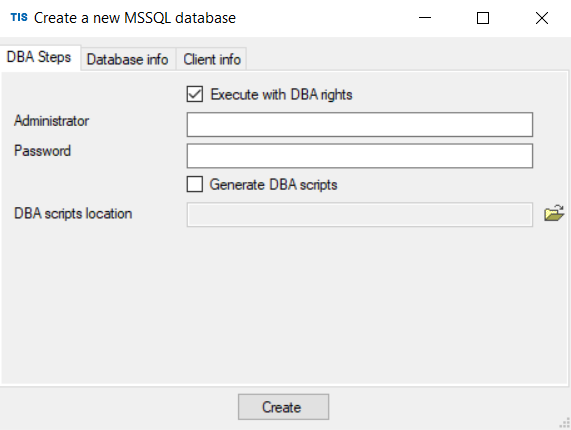
6.1.1
Choose DB Management/Create database/MSSQL
Enter admin credentials
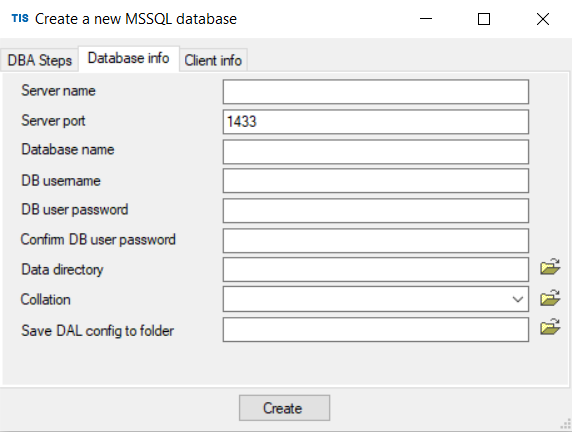
6.1.2
Enter database info
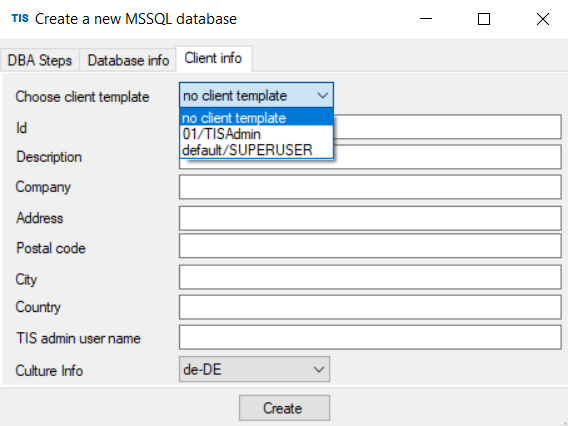
6.1.3
Enter client info, or
Choose one of the provided templates
For plano customers, choose "01/TISAdmin"
For SPX customers, choose "default/SUPERUSER"
6.1.4
Collect the generated file ximesdalconfig.xml(.s) to $TISCONFIG\deploymentconfigs\MyDeploymentConfig
6.2. Create ORACLE databases
Step
Description
Screenshot
6.2.1
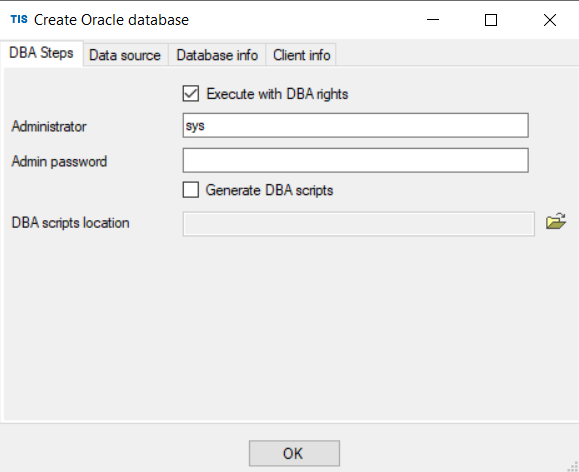
Choose DB Management/Create database/Oracle
Enter admin credentials
6.2.2
Enter data source: one can provide either the server information, or a full Oracle connection string
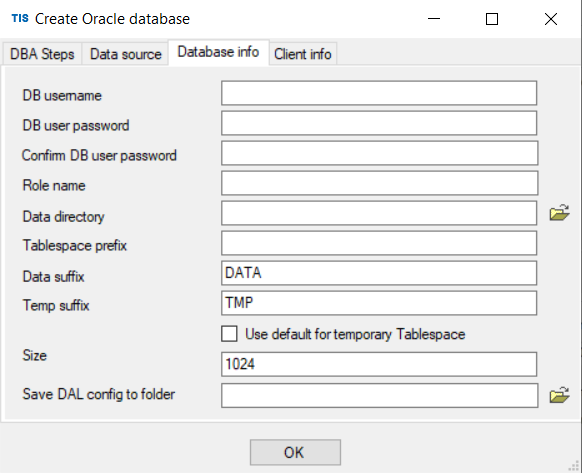
6.2.3
Provide database info
6.2.4
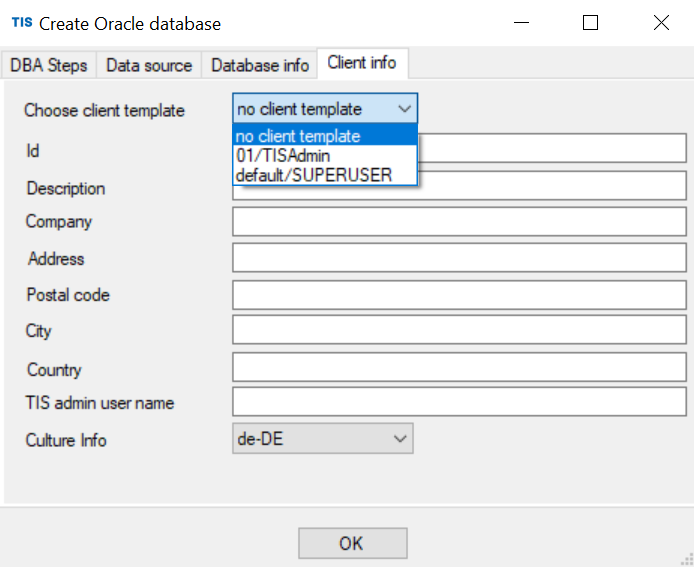
Enter client info, or choose one of the provided templates
Choose one of the provided templates
For plano customers, choose "01/TISAdmin"
For SPX customers, choose "default/SUPERUSER"
6.2.4
Collect the generated file ximesdalconfig.xml(.s) to $TISCONFIG\deploymentconfigs\MyDeploymentConfig
7. Update existing databases
7.1. Update existing MSSQL databases
Step
Description
Screenshot
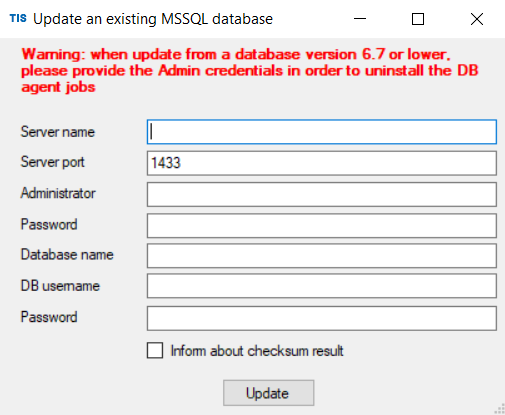
7.1.1
Choose "DB Management"/"Update"/"MSSQL"
Enter the required information. Please note the warning.
7.2. Update existing Oracle databases
7.2.1
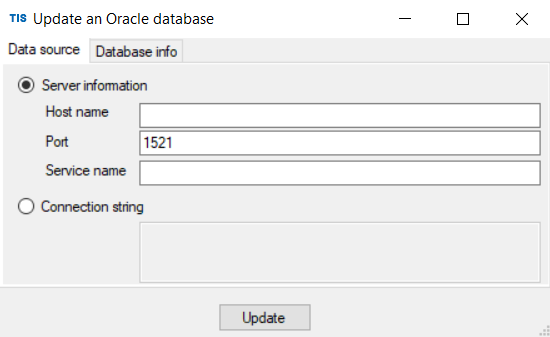
Choose "DB Management"/"Update"/"Oracle"
Enter datasource: one can provide either the server information, or a full Oracle connection string
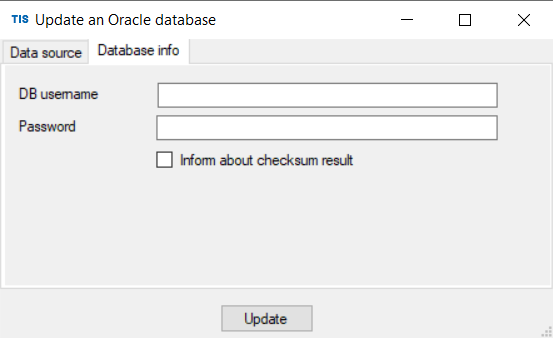
7.2.2
Enter the database username and password
7.2.3
Update ximesdalconfig.xml of the existing database (Oracle only): if the source TIS version is older than 6.6 and the DBMS is Oracle, the file ximesdalconfig.xml needs to be updated to a new format by choosing "DB Management"/XimesDalConfig/Update/"Oracle Ximes DAL config"
8. Generate Certificates for offline deployment
This step is only required if the server where TIS is installed does not have access to the Internet.
Step
Description
Screenshot
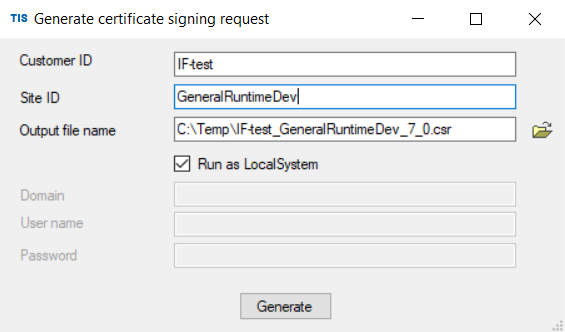
8.1
Choose "Certificates"/"Generate csr"
Enter the customer and site IDs
Choose the location of the csr file
8.2
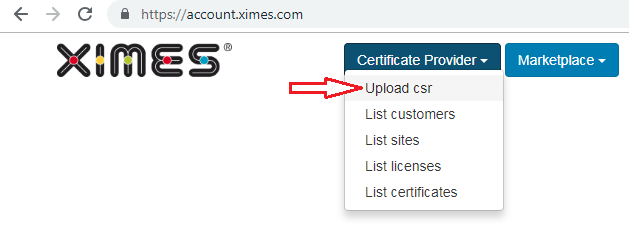
Log on to account.ximes.com
Choose "Certificate Provider"/"Upload csr"
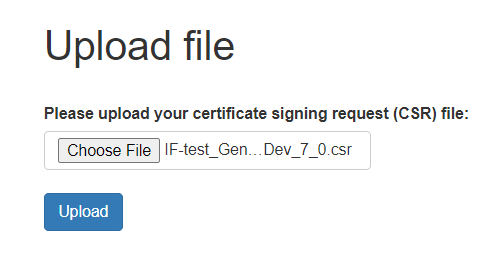
8.3
Upload the csr file
8.4
Download the generated certificate
8.5
Copy the dowloaded zip file to C:\ProgramData\XIMES\TIS\mycomputer.mycompany.com\1, where mycomputer.mycompany.com is the host name and 1 is the site name of the TIS installation (see step 3.3). If you put different values for host name and site name in step 3.3, please adapt the folder path here accordingly.
9. Deploy
Step
Description
Screenshot
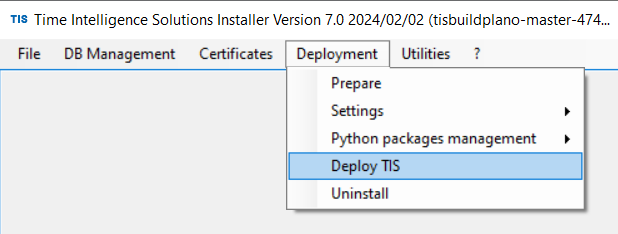
9.1
Choose "Deploy TIS" from the menu
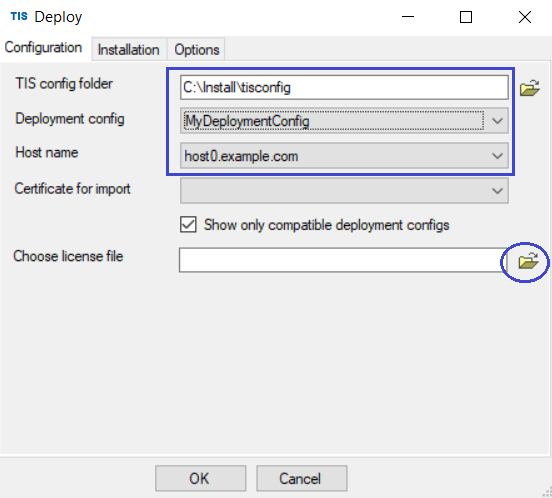
9.2
Choose the tisconfig folder (see step 3.2)
Choose SPX license file
Note that if step 8 was executed, one can choose the certificate to import
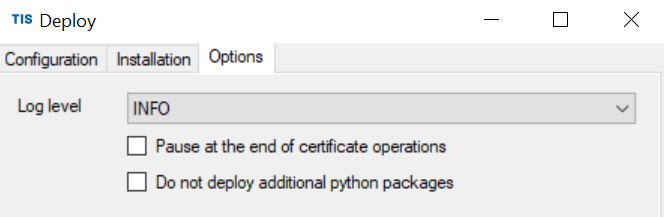
9.3
Enter the log level
Choose "Pause at the end of certificate operations" if you would like to see the output of each step regarding installing the certificates, namely generating a certificate signing request (csr), uploading the csr file to our server, and importing the received certificate files.
Choose "Do not deploy additional python packages" if you wish to install python packages separately.
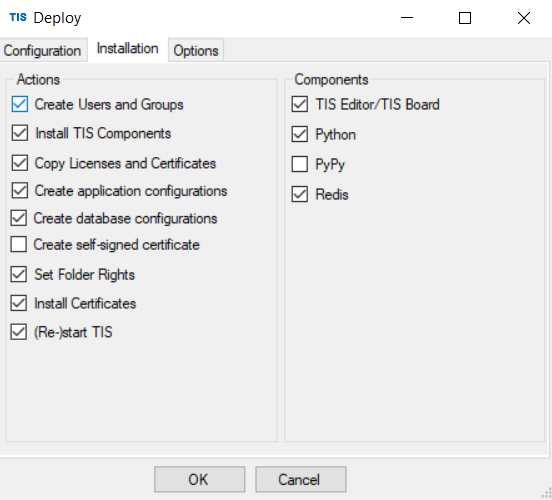
9.4
Choose actions to be executed
Create Users and Groups: only relevant if TIS is NOT deployed as LocalSystem. In this case, specific users for running TISBoard and TISEditor will be created
Install TISComponents: enable to choose components to be installed on the right group box
 Please make sure that you have the specific PLANO build of TIS