Export to CSV file (TIS file system) 3.0
Summary
- This operator exports a table of a data node into a CSV-file (Comma-Separated Values)
- This operator requires that a file will be exported, which is created in file management.
- Later you can download the file via file management.
Important:- This operator does NOT write on the drive of the server
- This operator writes in: TIS file management.
Configuration
Settings
Name | Value | Opt. | Description | Example |
|---|---|---|---|---|
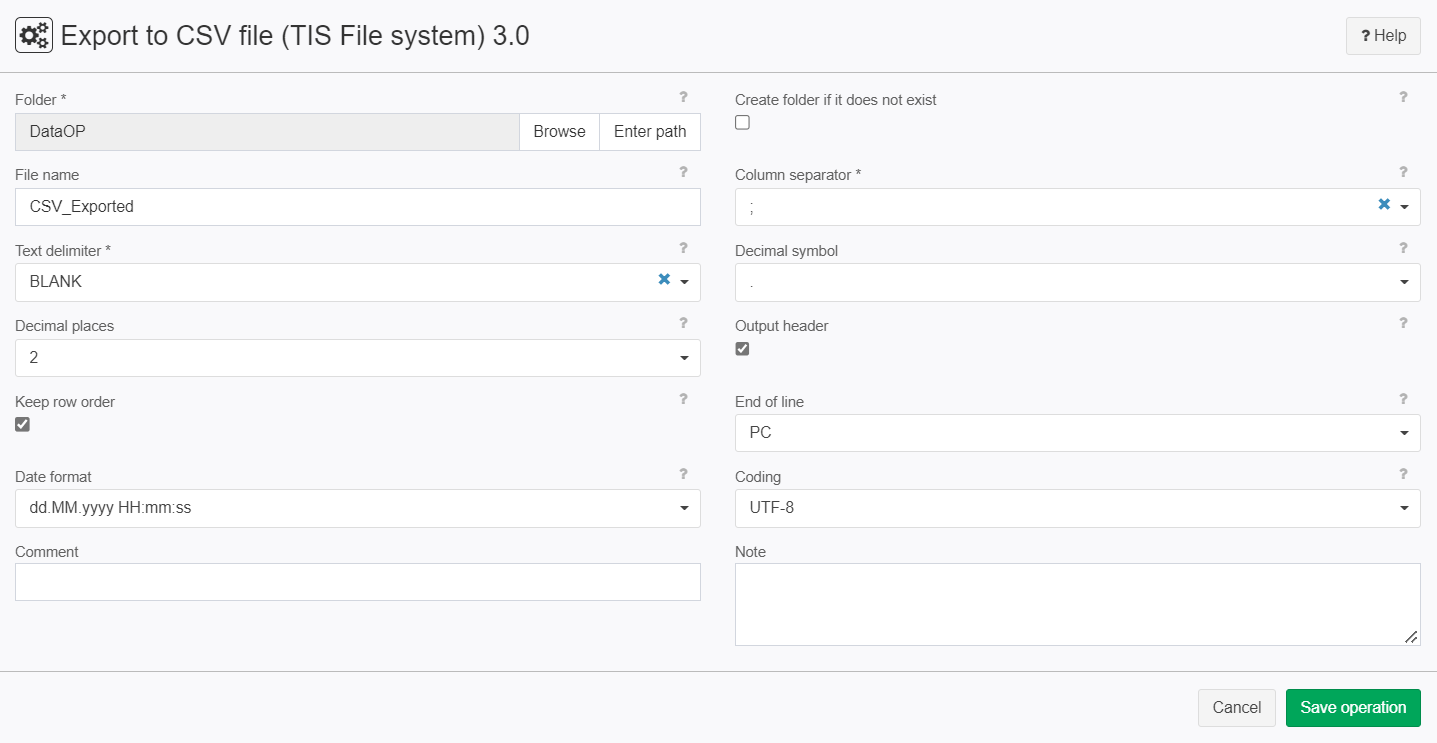
Folder | System.String | opt. | Target folder (in TIS file system) for the export | - |
Create folder if it does not exist | System.Boolean | - | ||
File name | System.String | - | Name of the export file (in TIS file system) | - |
Column separator | System.String
| opt. | The character used to separate the columns. | - |
Text delimiter | System.String
| opt. | The character that encloses a text. | - |
Decimal symbol | System.String
| - | Decimal separator | - |
Decimal places | System.String
| - | Number of decimal places to be output | - |
Output header | System.Boolean | - | Exports the column headings as a header. | - |
Keep row order | System.Boolean | - | The data sets will be exported in the same sequence as in the table. | - |
End of line | System.String
| - | Determines the symbol for end of line (PC=CrLf, UNIX=Lf, MAC=Cr) | - |
Date format | System.String
| - | Character string, which defines the date formatting | - |
Coding | System.String
| - | Character set coding of the output file | - |
Remarks
The file needs to be uploaded on the server first. See TIS- file management.
Column(s) which should be exported. Select manually or by using the dialog on the right.
You do not need to recreate the operator every time you want to updated the file, you just need to recalculate the operator.
Format your table and cut columns using Filter on columns 1.2.
Want to learn more?
Screenshots

Examples
Example: Export in CSV
Situation | A table that will be exported a CSV-file in the TIS file system  |
|---|---|
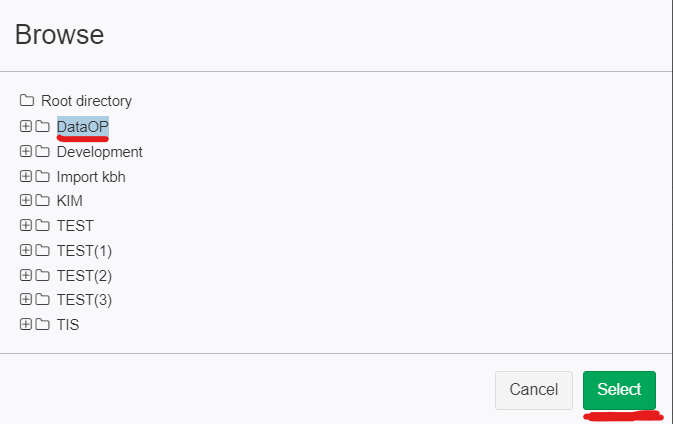
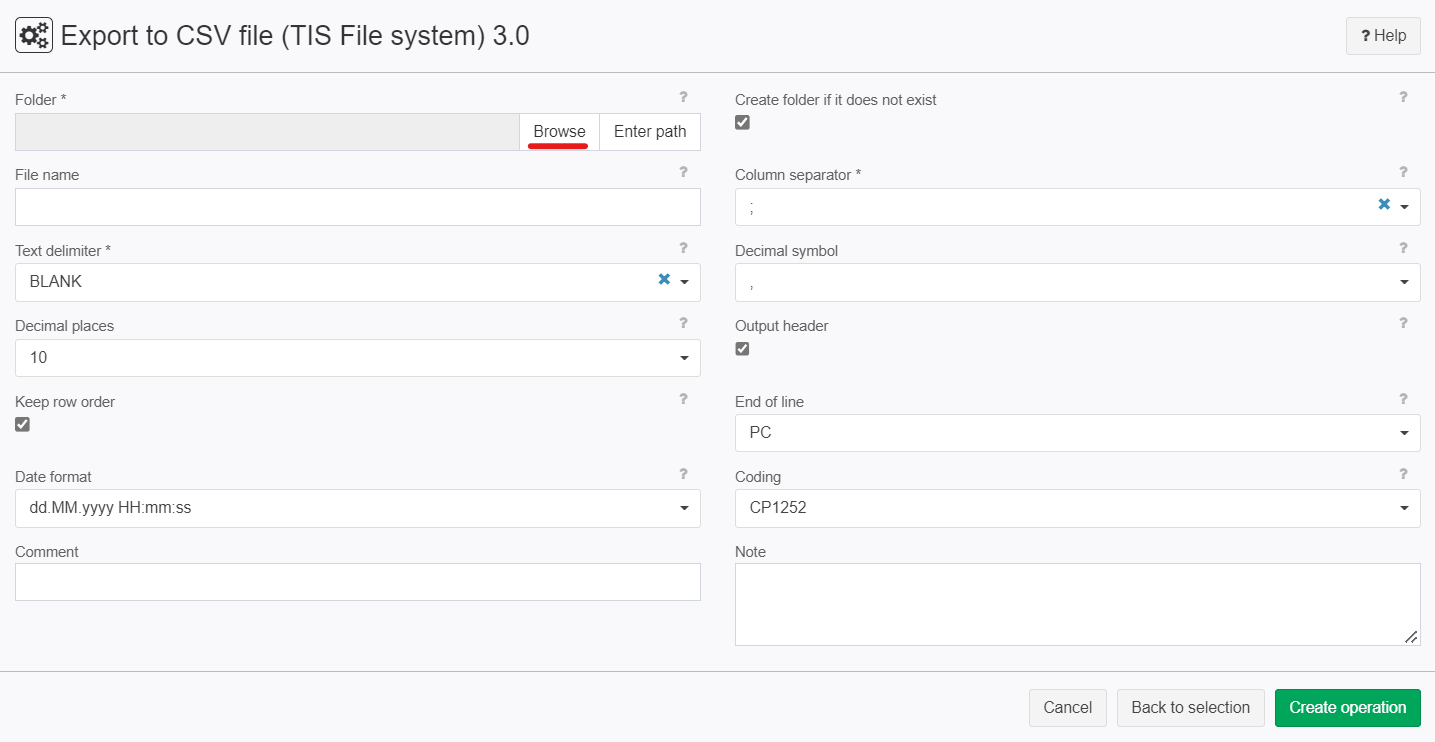
Settings | Choose a folder in which the file will be exported to, you can also enter a path manually.
Click on the folder you want the file to be saved in and Click "Select".  Then configure the settings to your liking and create the operation.
|
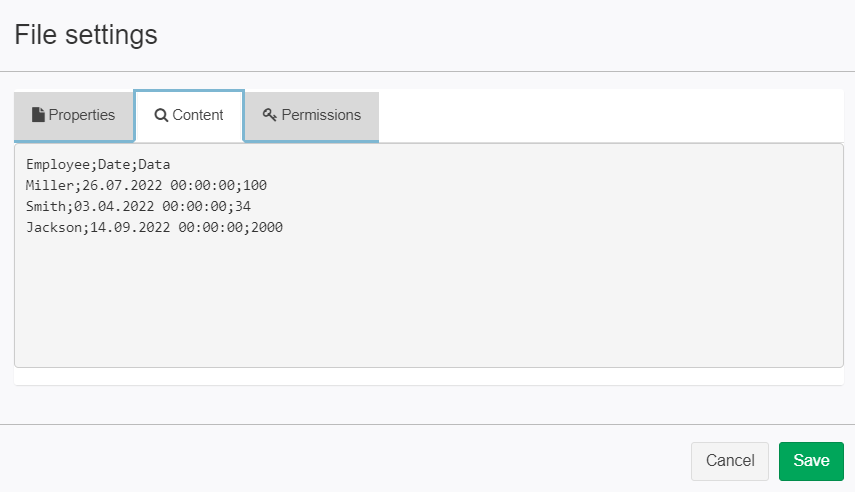
Result | To be sure that the table was exported you can go to the "TIS files" in the menu that is located in the bottom left corner and look for you file.
You can also check its contents and more by clicking on the file.
|
Project File | - |
Troubleshooting
Nothing known up to now.


