Controller (Portlet)
Summary
This portlet allows to control the data in a data node's result table.
The following two friend operators can be used to connect to this portlet.
- TIS Board - Multiple selection 3.0: This operator allows to filter data in a result table according to one or more keys in up to three columns. Multiple selection is useful to display data in grids and charts or for calculations based on the filtered data only.
- TIS Board - Recalculate 3.0: This operator allows to recalculate a data node. This is useful after a data node has been changed, e.g., by an Editable Grid, and data nodes have to be updated.
Example: Controller with Multiple Selection
Task | Actions |
|---|---|
Prepare in TIS Editor | Follow the steps in the example of TIS Board - Multiple selection 3.0. Project file Confluence Multiple Selection 3.0.gzip |
Create Portlet in Portlet Designer | |
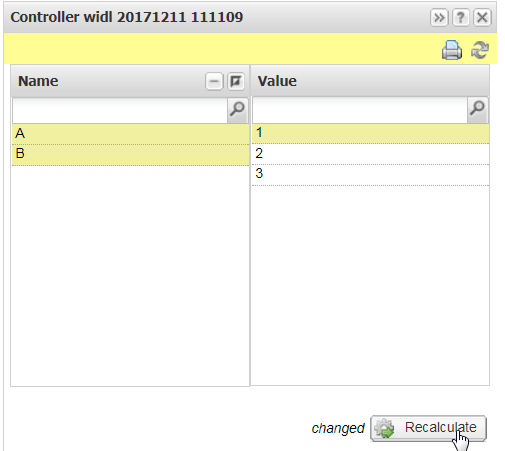
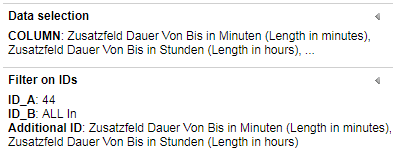
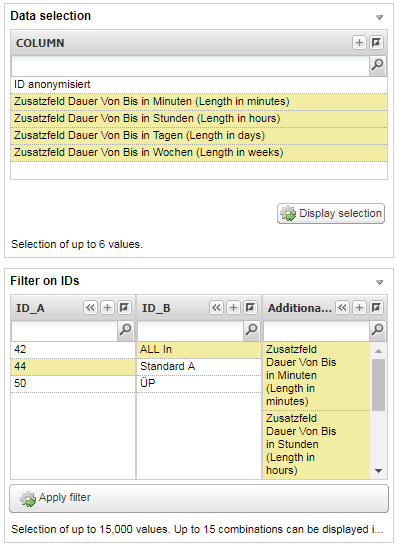
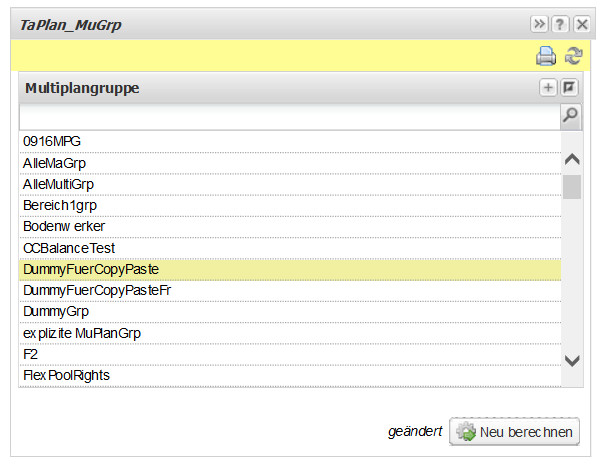
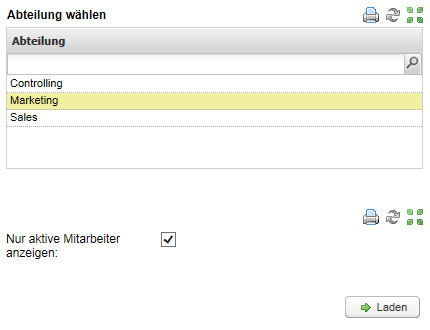
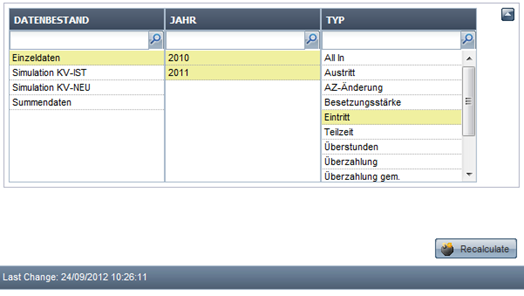
Set filter criteria |
After clicking "Recalculate", parameter values are updated in the data node.
|
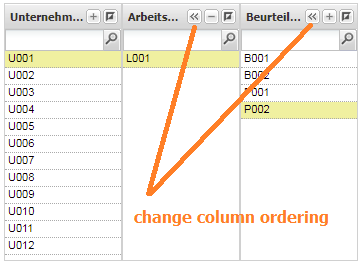
Column ordering | Enable column ordering
Buttons for changing the column ordering.
|
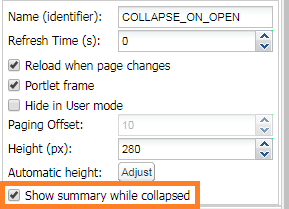
Show selection summary | Select "Show summary while collapsed" option in the portlet's properties.
Collapsed state
Expanded state
|


Troubleshooting
Problem | Possible Cause | Solution |
|---|---|---|
No data shown in the data node | No filter criteria selected | Check this box in the operation settings:
This makes sure that data will be displayed. |
Example: Recalculation Portlet
Task | Actions |
|---|---|
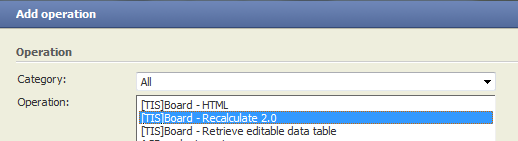
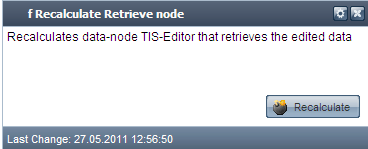
Prepare in TIS Editor Step 1 | Create an empty data node in TIS Editor and add the operation TIS Board - Recalculate 3.0 |
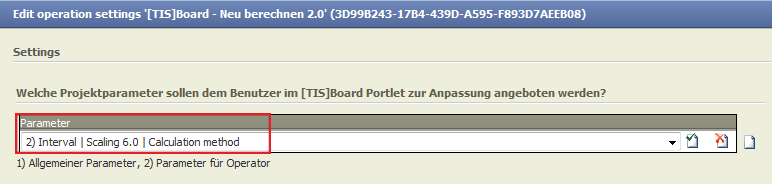
Prepare in TIS Editor Step 2 | In the operation settings add a new line for each Parameters you want to control |
Prepare in TIS Editor Step 3 | Select the Parameters you want to be visible in the Portlet |
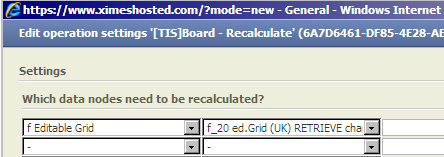
Prepare in TIS Editor Step 4 | This will allow you to select data nodes that should be recalculated, e.g., the read data node of an Editable Grid.
|
Prepare in TIS Editor Step 5 | Optionally add Parameters – see: How to work with Parameters in TIS Board? |
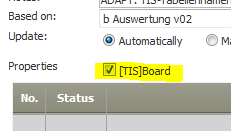
Prepare in TIS Editor Step 6 | Switch on the symbol for TIS Board connection in TIS Editor in the RETRIEVAL data node |
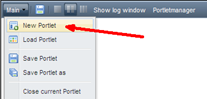
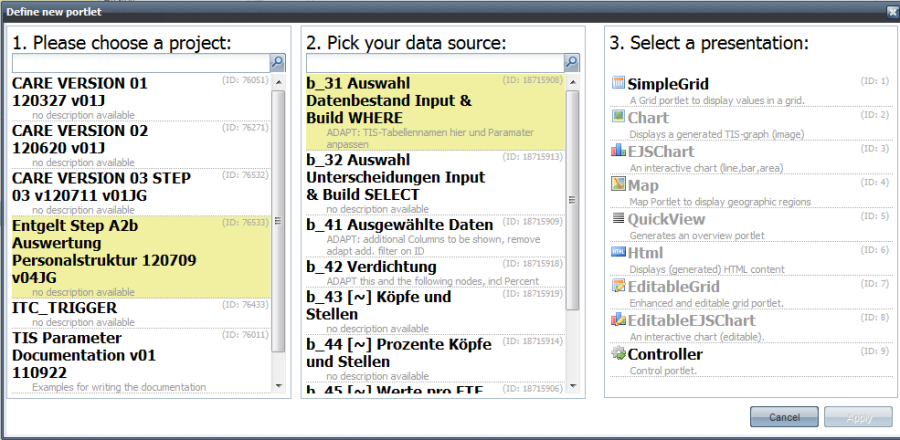
Create in Portlet Designer Step 1 | Select New Portlet |
Create in Portlet Designer Step 2 | Select the TIS Editor project, the data node, and select the type of Portlet(see Create CONTROLLER Portlets for a description of these steps) |
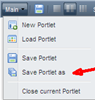
Create in Portlet Designer Step 3 | SAVE PORTLET |
Edit in Portlet Designer | |
SAVE & Close | Save the changes of this Portlet and close it in Portlet Designer. |
TIPS | The controller Portlet allows for managing the update and retrieval of data from an editable grid. |
NOTE | As soon as you USE the Recalculate Button, TIS Board takes exclusive control of the corresponding project.
|
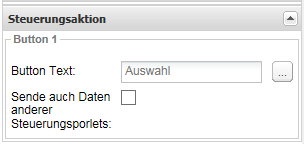
Change Button Name | The button text for Control Portlets can be changed in the Portlet Designer. |
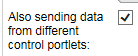
Combine Controller Portlets | Several control portlets (incl. Multiselect) can combined so that only one calculate button needs to be clicked. Activate the button "Send also data of other control portlets".
Example for hiding send buttons of other control portlets:
Same for SPX Picker portlets. |
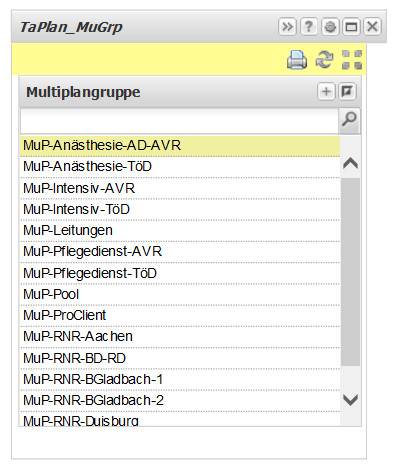
Example Combined Control Portlets | An example for a Multiple Selection portlet combined with a Control portlet. |
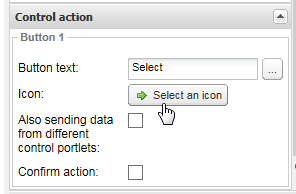
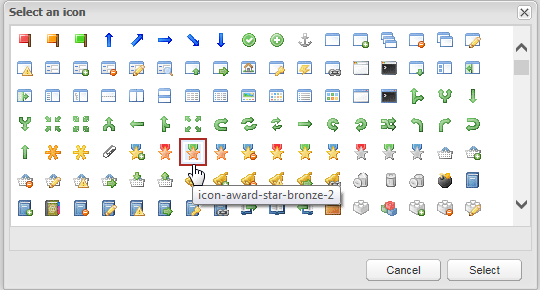
User defined Icons | The symbol of the control button can be defined in the Portlet Designer. |
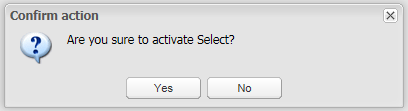
Confirmation of Recalculation | It can be chosen if the recalculation needs to be confirmed by the user.
Confirm question options:
|
Use wide Buttons | The button width is 100% of the portlet width if "Use wide buttons" is checked, otherwise it is normally shaped and right aligned. |
Reload page layout | The page layout is reloaded, which updates the portlet's properties, such as "collapsed". |
Text formatting |


Want to learn more?
Settings
Examples
Controller with Multiple Selection
Step | Actions |
|---|---|
TIS Editor Step 1 Add node | Add a new node in TIS Editor and select a parent node. The parent node's result table contains the data to be filtered. |
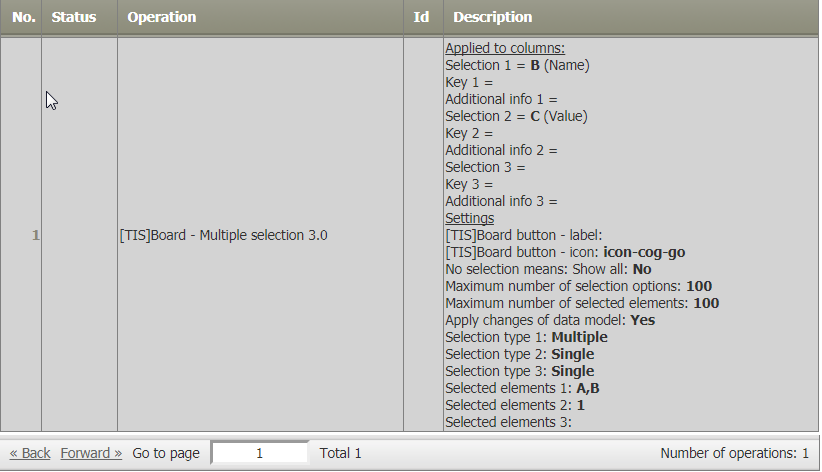
TIS Editor Step 2 Add operation | Add the operator TIS Board - Multiple selection 3.0. Note: This operator has to be in the first operation of the data node and the data node must reference a parent node. In the operation settings, choose up to three columns whose contents are to be used as selection criteria to filter the rows of the table. These columns are set as "Selection list 1", "Selection list 2", and "Selection list 3". For details on the other settings, see the description of the operator TIS Board - Multiple selection 3.0. Define for each selection column whether it should serve for single or multiple selection. With single selection, data of only one row can be selected as filter, with multiple selection, more than one row can be selected. The parameters "Selected entries" contain the filter criteria selected from the columns. They will be set by the Controller Portlet.
|
TIS Editor Step 3 | Set the TIS Board connection. |
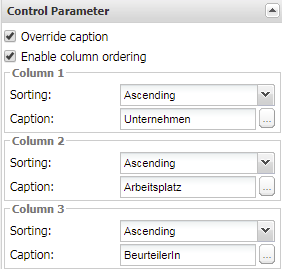
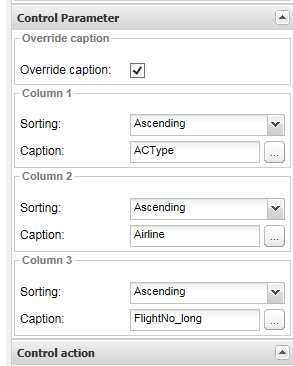
TIS Board Step 1 Create a Portlet in Portlet Designer | Choose the above project and data node, and select the Controller Portlet. Further, the sorting of the columns can be defined. |
Applying the Multiple selection in TIS Board | Add the portlet to a dashboard. |
Limit Number of Records | The number of allowed values to choose can be limited. |
Edit Caption | The caption of the columns can be changed in the Portlet Designer. |


Troubleshooting
Problem | Frequent Cause | Solutions |
|---|---|---|
... | ... |