Import text or CSV file with manual column assignment 4.0
Summary
This operator allows to import data from a text file where values are separated by comma (comma separated values, CSV) or another symbol.
It can only be applied to an empty data node.
The text file has to be available in the TIS File on the TIS Server. Therefore, a file from a local storage has to be uploaded to the TIS Server.
Import via Parameters | As of version 5.8 import files can be defined via Parameters. |
Error Node | As of version 5.8 a specific error node can be defined. This way, error nodes can be displayed in TIS Board. The error node contains data rows that could not be properly interpreted. |
Configuration
Settings
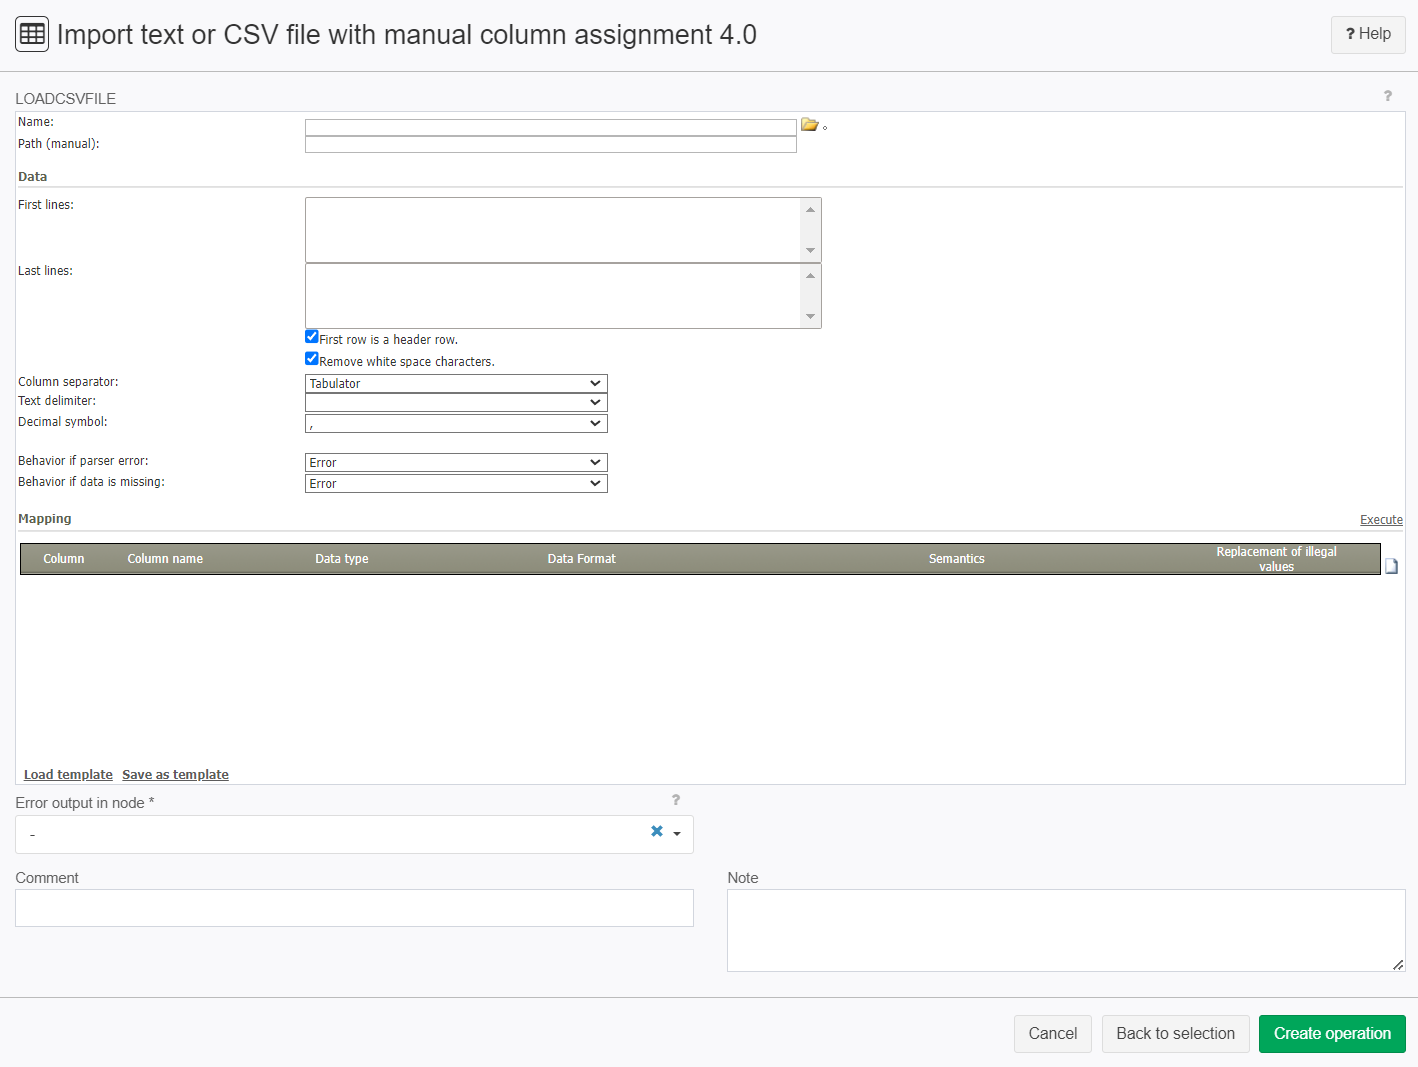
Name | Value | Opt. | Description | Example |
|---|---|---|---|---|
@LOADCSVFILE
| System.String - | - | - | |
| Confluence\confluence-upload-CSV.txt | |||
2. Name of the file, including path. Entered manually and can be a parameter. |
| |||
3. Information box showing the first and last lines of the import file defined above. |
| |||
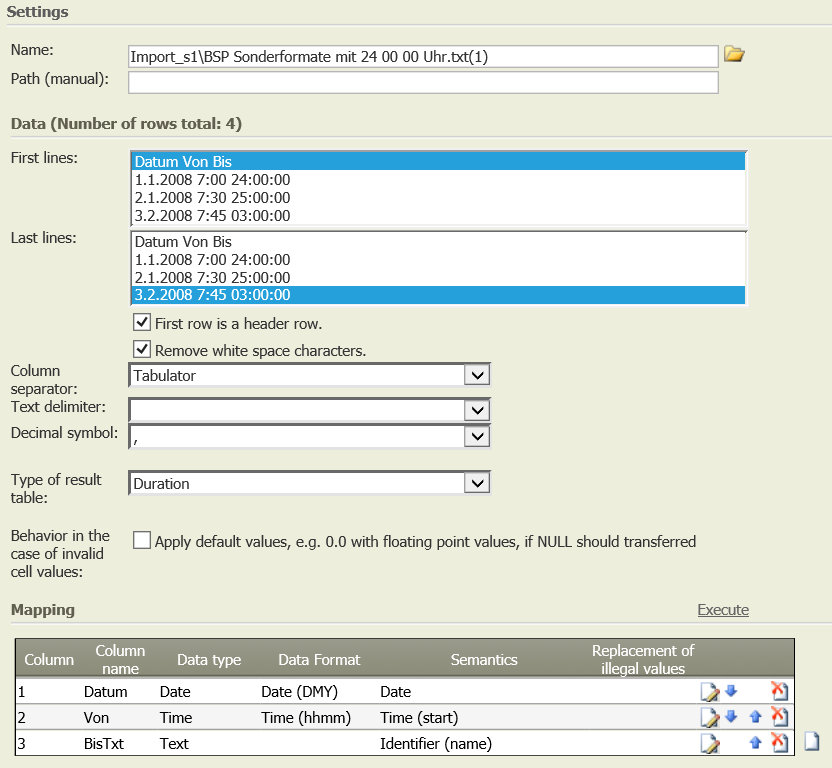
4. When checked, the data of the first row in the file is used as headers. | Headers will be "Datum", "Von", and "Bis"
| |||
5. When checked, white space characters around the column separator will be removed. | - | |||
6. Character that separates columns in the input file. | - | |||
7. Symbol enclosing text in the input file. | - | |||
8. Symbol separating the integral part from the fractional part in decimal numbers (this is "," in German, but "." in English). | - | |||
9. Determines what to do when a parser error ocours
| - | |||
10.Determines what to do when data is missing at some parts of a file
| - | |||
11. Suggested mapping from the input file to the table. Created after clicking "Execute" on the upper right. Can be modified manually by using the symbols to the left. |
| |||
Error output in node | System.Int32 | opt. | An empty data node to save rows that could not be imported. | - |
Want to learn more?
Imports data from a text file.
Screenshot
 Examples
Example: Import text file of the type "Date/Time/Time"
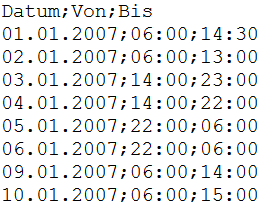
Situation | The text file Import_1.txt is to be imported into a data node.
|
Step 1 | Go to Editor Homepage and choose the TIS File tab; upload file.
|
Step 2 | Create an empty data node. To this node, add the operation "Import Text or CSV file 3.0". Click on the folder symbol next to "Name" and select the import file.  Alternatively, files can be defined via parameters under "Path (manual):"
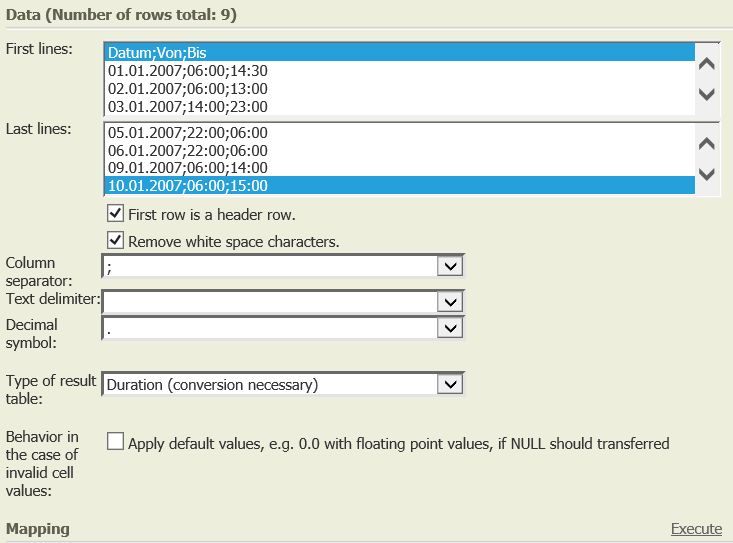
Then choose the following settings:
Then click "Execute" to let TIS suggest the columns based on your suggestions. You will need to correct the suggested column "Bis" to Semantics: "Time (end)".
As of version 5.8 a specific error node can optionally be defined. That gives the possibility that error nodes can be displayed in TIS Board. Create an empty data node and choose the node as data node in the import operation.
|
Result |
|
Further steps | The resulting table should be converted to date+time/date+time to allow operations such as Scaling 8.0. |
TIS Project |
Example 2: Import file of type date+time/date+time
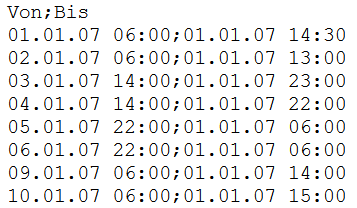
Situation | Read in the text file Import_2a.txt
First, save the file on your PC and then import it into TIS (see TIS:Datenmanagement (link to old wiki)). Create an empty node in the TIS project and add operation "Import text or csv-file". |
Operation setting | Click on the folder symbol next to "Name" and select the import file. Alternatively, files can be defined via parameters under "Path (manual):"
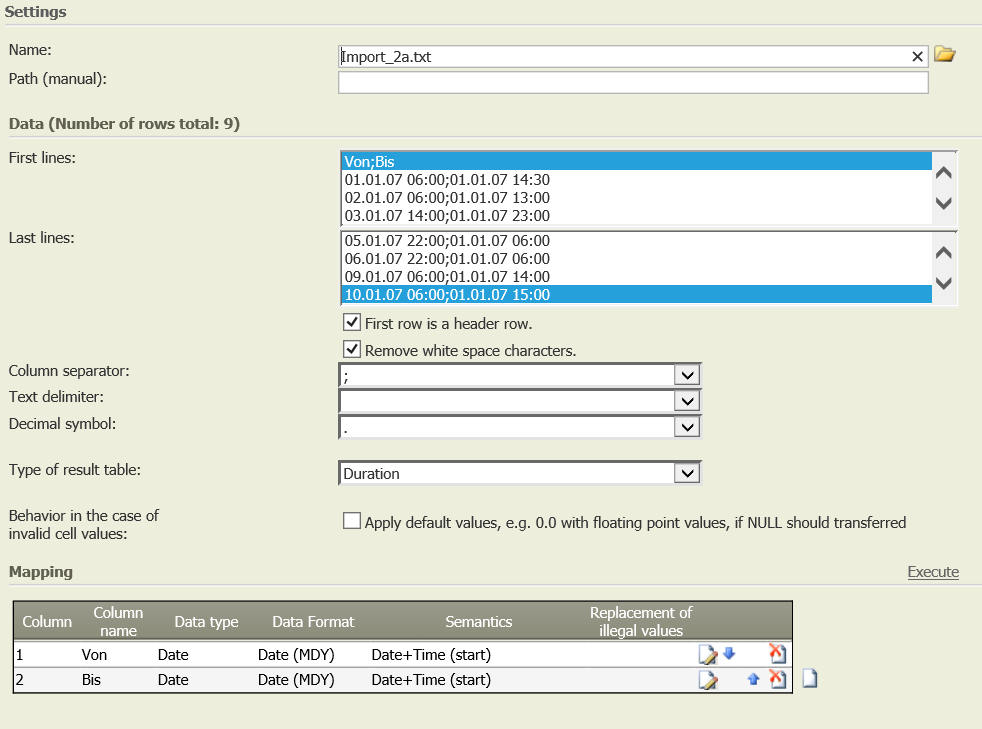
Then, chose the following settings:
Click "Execute" to let TIS suggest the columns based on your suggestions. You will need to correct the suggested column "Bis" to Semantics: "Date+Time (end)". Please note: Click on the button "Edit" to change settings. Click on the button "Apply" to confirm changes. As of version 5.8 a specific error node can optionally be defined. That gives the possibility that error nodes can be displayed in [TIS]Board. Define an empty data node and choose the node as data node in the import operation.
|
Result |  |
TIS Project |
Example 3: Import file of type date+time/date+time with overlap to the next day
Situation | Read in the text file Datum;Von;Bis Please note: Times overlapping to the next day are indicated by different formats here: 25:00, 5:00+, and 6*00. This example will demonstrate how to read in each of these formats. |
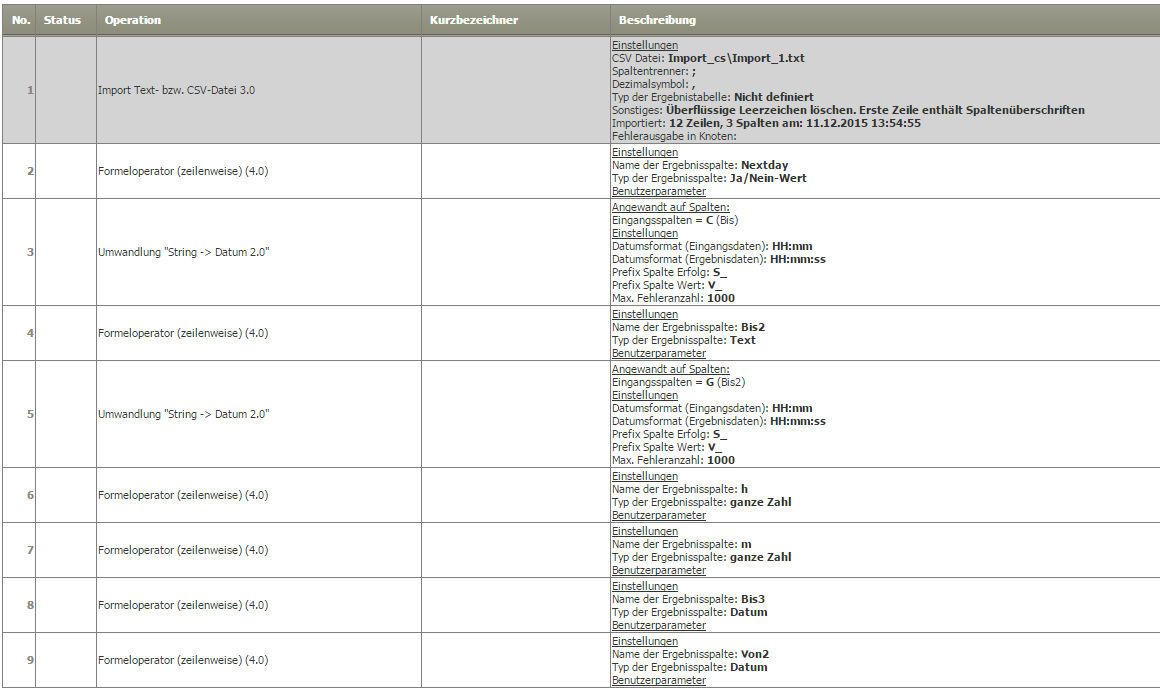
Operation setting | One solution for this is to apply the Formula operator (row-by-row) (5.0) to create new columns which calculate the correct date and time:
Formulas are: 1. NextDay [Ja/Nein]: #Bis#.Substring(#Bis#.Length-1 > 0 ? #Bis#.Length - 1 : 0) == "+" || #Bis#.Contains("*") |
Result |  |
TIS Project |
Troubleshooting
Problem | Frequent Cause | Solutions |
|---|---|---|
Everything is suggested as Identifier although I wanted to read in Text. |
| |
How can I make changes to the "Mapping" table? |
| |
"Execute" is suggesting only 1 column with all column titles in "Mapping" | Commong error: Wrong column separator has been chosen (e.g., semicolon instead of tabulator) | Check column separator, change it and click "execute" |
The operation does not read in the decimal points (or not in every column) |
|
|
24:00 is not imported correctly | 24:00 is no allowed format, because in most software systems it means that it is already the next day. | 1. Trick: Replacement of illegal values in combination with formula operator:
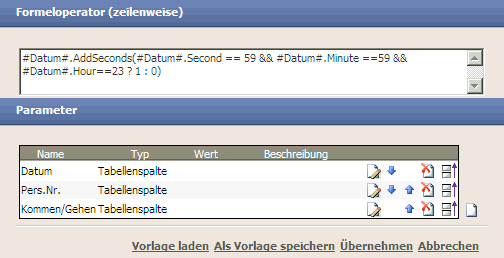
If the column that needs to be changed is named "Datum", then you can copy this formula: #Datum#.AddSeconds(#Datum#.Second == 59 && #Datum#.Minute ==59 && #Datum#.Hour==23 ? 1 : 0) |
A time overlapping to the next day is included (e.g., 25:00) | 25:00 is no allowed format, because in most software systems it means that it is already the next day. | Possible solutions please see Example 3 above Another trick: Use data type "Text" for time
Resulting in:
|


